Welcome to The Beginners Guide to Acrylic Pouring, your gateway to exploring a mesmerizing art form. Learn about the right materials, techniques, and steps to create stunning contemporary art pieces with vibrant and fluid results. Dive into the fascinating world of acrylic pouring!
In this friendly and detailed guide, we’ll walk you through everything you need to know to get started with acrylic pouring. Whether you’re a complete novice or someone looking to improve your technique, there’s something here for you. So, let’s dive in together.

Overview
Acrylic Paint Pouring
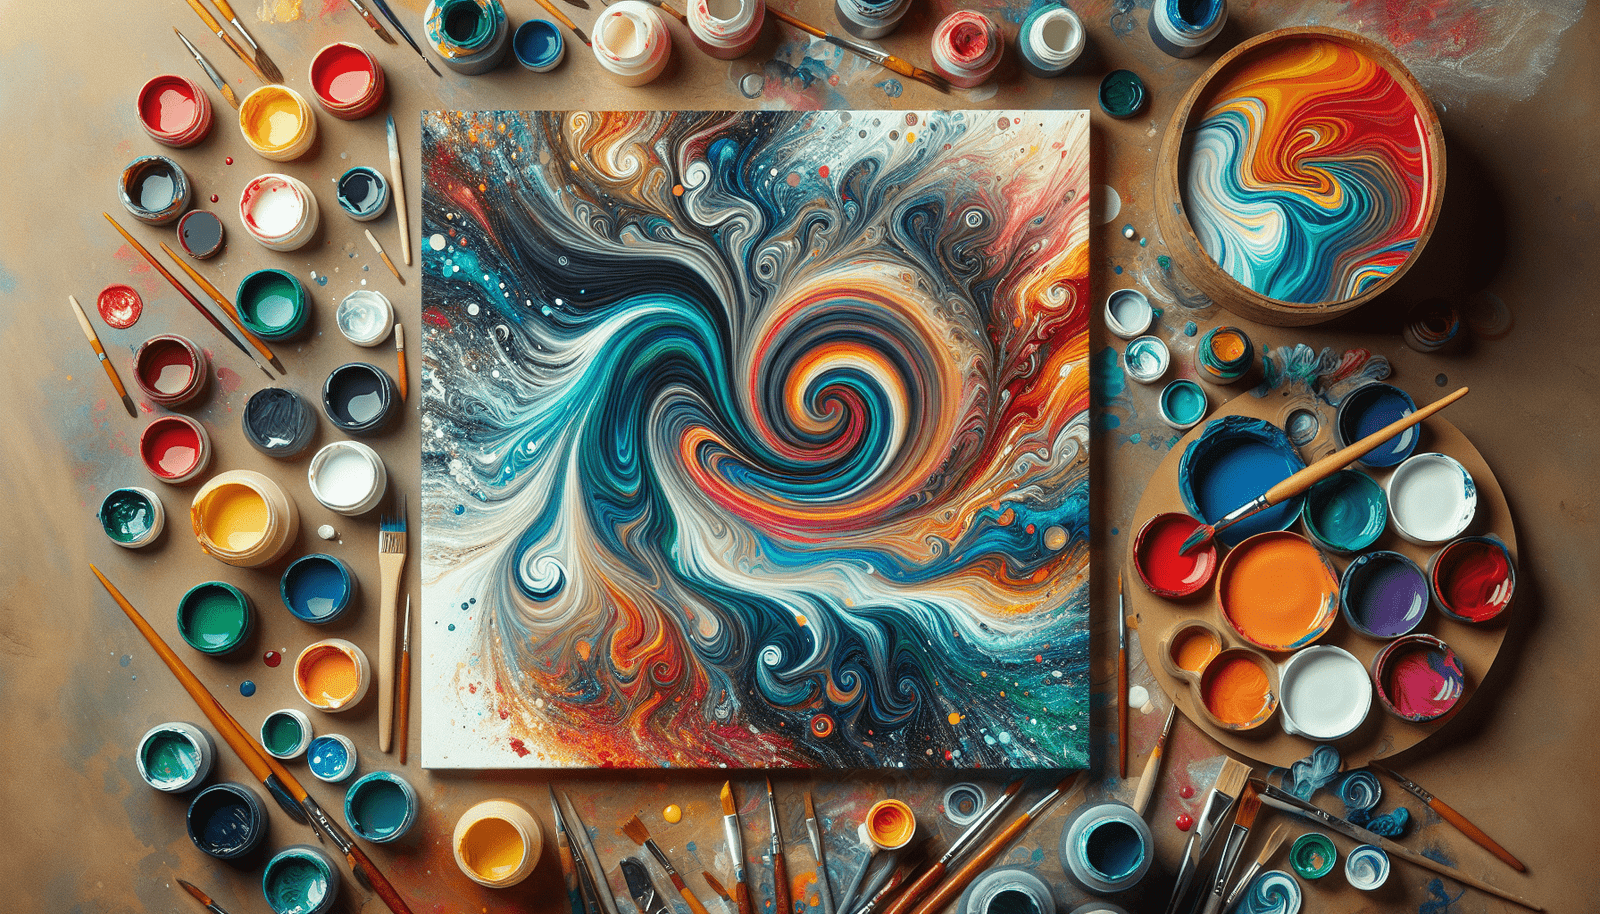
Acrylic pouring is a fluid painting technique that’s both accessible and wonderfully creative. It involves pouring liquid acrylic paints onto a canvas or surface, allowing the colors to blend and create abstract designs. The process can yield quick, dramatic, and visually stunning results that are sure to impress.
Popularity
One of the reasons acrylic pouring has skyrocketed in popularity, especially among beginners, is its simplicity and rewarding nature. The technique is relatively easy to grasp and doesn’t require a significant investment in materials or tools. Before you know it, you’ll be producing contemporary masterpieces that are perfect for home decor, gifts, or simply personal enjoyment.
Materials Needed
Before you start, it’s crucial to gather the right materials. The quality of your materials can significantly impact your final result, so let’s take a closer look at what you’ll need.
Acrylic Paints
The type of paint you use will significantly impact your pour’s success. Here’s a simple guide to help you understand the different options.
| Paint Type | Description | Notes |
|---|---|---|
| Soft Body Acrylic Paints & Inks | These have an ideal consistency similar to milk or heavy cream. | Great for beginners due to easier mixing and pouring. |
| Heavy Body Acrylics | Thicker and more viscous, requiring more mixing medium to achieve the right consistency. | Can be challenging to mix smoothly, but offer rich, bold colors. |
| Student Grade Acrylic Paints | Generally thicker in texture, these paints will also require more medium to thin out properly. | An affordable option, but be prepared for extra mixing effort. |
Acrylic Pouring Medium
A pouring medium is essential for achieving a smooth, even finish. While some may use PVA glue as a substitute, specialized acrylic pouring mediums are recommended for optimal results. They ensure that the paint maintains its integrity and doesn’t crack when dry.
Surface
Choosing the correct surface is crucial for your acrylic pouring projects. Primed canvases, boards, or panels work well. Ensure that the surface is properly prepared to prevent any unwanted blemishes.
Accessories
You’ll need a few additional tools to make your pouring process clean and efficient:
- Disposable Cups: For mixing paints and mediums.
- Spatulas: Useful for spreading paint.
- Protective Surface: Lay down plastic sheets or newspapers to protect your workspace.
- Elevation Tools: Objects like jars or tins can be used to lift your canvas off the worktable, allowing excess paint to drip off without sticking to the bottom.
Preparation Steps
Preparation is key when it comes to successful acrylic pouring. Let’s go through the steps to ensure you’re all set for a seamless creative experience.
Surface Preparation
Before you begin, make sure your canvas or panel is primed and clean. This will help avoid any uneven paint films. A well-prepped surface ensures that the paint adheres correctly and flows smoothly.
Surface Elevation
To avoid excess paint from sticking to the bottom of your canvas, elevate it using jars, tins, or other small objects. This allows the paint to drip off freely, creating a cleaner edge to your artwork.
Level Surface
It’s crucial to work on a level surface. An uneven workspace can cause the paint to pool in certain areas, leading to an unbalanced design. Use a level tool to check that your work area is perfectly flat.
Mixing Paints
Now that your surface is ready, it’s time to mix your paints. Achieving the right consistency is essential for a successful pour.
Consistency
When mixing your paints with the pouring medium, aim for a honey-like consistency. This allows the paint to flow smoothly without being too runny. It’s a bit like cooking—you want to find that sweet spot where the mixture is perfect for pouring.
Avoid Bubbles
Gently mix your paints and medium to avoid creating air bubbles. Air bubbles can ruin your design by creating unwanted holes and imperfections. Once mixed, let the mixture sit for a few minutes to allow any trapped bubbles to escape.

Choosing Colours
One of the most exciting parts of acrylic pouring is choosing your colors. While it can be tempting to use every color in the rainbow, starting with just a few colors will help you practice and understand how different hues interact.
Experiment with complementary and contrasting colors to see how they blend and create new shades. As you get more comfortable, you can start incorporating more colors into your pours for even more intricate designs.
Key Takeaways
Technique Complexity
Acrylic pouring may appear simple at first glance, but mastering the technique can take a bit of practice. Don’t be disheartened if your first few attempts don’t turn out as expected. Each pour teaches you something new, and over time you’ll develop a keen sense of how to control the flow and blend of your paints.
Importance of Preparation
Proper preparation and the right materials are crucial for successful pours. From prepping your surface to mixing your paints correctly, each step plays a significant role in your final artwork. Take your time to set up and follow the necessary steps to ensure the best results.
Conclusion
Acrylic pouring is a rewarding and accessible art form that anyone can enjoy. With the right preparation and materials, you can create stunning, unique pieces of art. So gather your supplies, set up your workspace, and let your creativity flow.
Remember, the joy is in the process as much as the end result. Happy pouring!