Join me for a super fun evening of fluid art in the comfort of your own home! In this article, I will be sharing my experience with the swipe and spin acrylic paint pouring technique. I recently participated in a Facebook Challenge group, where I was randomly assigned the swipe technique. However, I decided to take it a step further and add a spin to create a unique and captivating art piece. I will walk you through the process, share the supplies I used, and provide some tips and tricks along the way. Get ready to unleash your creativity and let the paint flow!
WATCH my SPIN & SWIPE Acrylic Paint Pouring Technique Video
Hey there! I’m so excited to share with you my latest acrylic paint pouring technique video. In this video, I’ll be demonstrating the swipe and spin technique, which combines two fun and fascinating paint pouring techniques.
SUPPLIES I USED FOR MY SWIPE & SPIN ART
Before we dive into the technique, let me give you a rundown of the supplies I used for my swipe and spin art. I used ColourArte Primary Elements pigment powders, as well as ColourArte Putting on the Glitz pigment powders to create a vibrant and eye-catching color palette. I also used Floetrol as my pouring medium, Elmer’s Glue-All for added consistency, and Treadmill Silicone oil to create beautiful cells in my artwork. Other supplies included an 8″x10″ canvas, Dixie cups, stir sticks, and a rotating cake stand as my spinner.
MY PAINT AND POURING MEDIUM RECIPES
For the paint recipe, I mixed 2-parts pouring medium to 1-part paint, adjusting the ratios as needed for desired consistency. My pouring medium recipe consisted of 3-parts Floetrol, 2-parts Elmer’s Glue-All, and 1-part water. When mixing pigment powders, I added enough pouring medium to cover the cup’s bottom, dissolved the powder, and then added the remaining pouring medium to the cup.

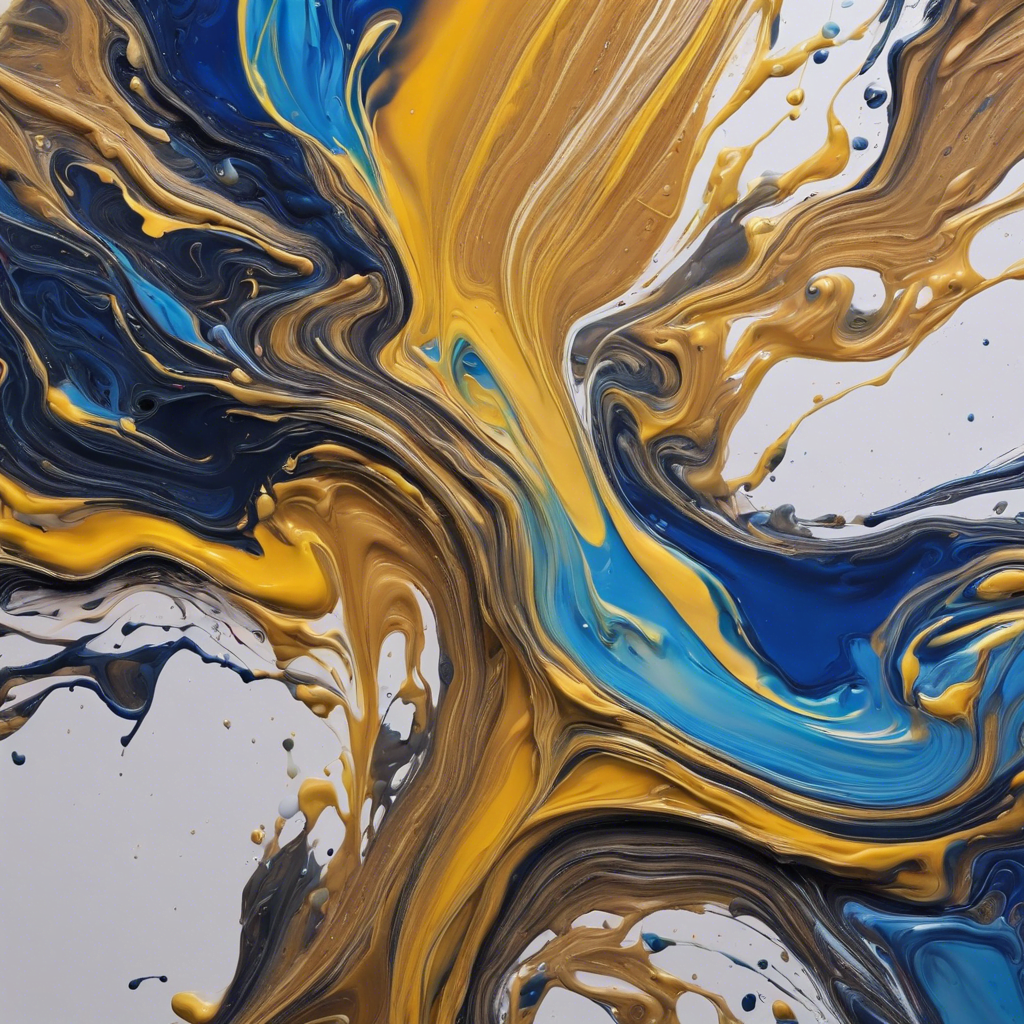
MY SWIPE & SPIN PROCESS
Now let’s get into the fun part – the swipe and spin process! First, I mixed my paints and added 3 drops of Treadmill Silicone oil to each color. It’s important to mix the silicone oil gently and slowly to ensure the cells form properly.
To start the swipe technique, I added the colors to the canvas in a spiral design. Then, I added white paint to the sides, edges, and corners of the canvas to ensure complete coverage. For the swipe color, I used white paint on the right side of the canvas. I used a dry paper towel as my swipe tool, gently placing it over the top of the swipe color and gradually pulling it down the canvas to create beautiful cells.
After allowing the cells to grow and adding heat as needed, I decided to take my artwork to the next level by spinning the canvas. To secure the canvas on the spinner, I added some paint, water, or pouring medium to the spinner surface before placing the canvas. This moisture helps keep the canvas secure during the spinning process.
I had an absolute blast working on these art pieces! The swipe and spin technique is a fantastic way to create unique galaxy or space-inspired art. The combination of vibrant colors, beautiful cells, and the dynamic spinning movement adds a whole new dimension to the final artwork.
A FREE RESOURCE TO ASSIST YOU: PAINT POUR CALCULATORS
If you’ve ever struggled with determining how much paint to use for your projects, I’ve got just the solution for you – paint pour calculators! I know it can be frustrating to mix too much or too little paint, but these calculators will help take the guesswork out of the equation.
To use the calculators, simply enter the height and width of your surface (or diameter if using a circle surface) and the depth of the side. The calculators will then provide you with the approximate ounces of paint you’ll need to complete your project. It’s a handy tool that can save you time, effort, and resources.
For more information on how to use these calculators and a quick guide for common surfaces, be sure to check out the link provided. It’s a free resource that will make your paint pouring projects much more manageable and enjoyable.

Categories
Before I wrap up this article, let me give you a quick overview of the different categories you can explore in the world of acrylic paint pouring. Whether you’re a beginner or an experienced artist, there’s something for everyone to discover:
- Acrylic Paint Pouring Techniques, Tools & Storage
- Artist Spotlight
- Fluid Art Tips, Techniques & Supplies
- Fluid Art with Erika Updates
- Gift Giving Guides
- Gift Ideas YOU Can Create!
- Resin Art
- TECHNIQUE: Cloud Effect Paint Pouring
- TECHNIQUE: Dip Paint Pouring
- TECHNIQUE: Dirty Paint Pouring
- TECHNIQUE: Dutch Paint Pouring
- TECHNIQUE: Flip Cup Paint Pouring
- TECHNIQUE: Puddle Paint Pouring
- TECHNIQUE: Ribbon Paint Pouring
- TECHNIQUE: Sheelee Art Inspired Bloom Paint Pouring
- TECHNIQUE: SPIN! Paint Pouring
- TECHNIQUE: Swipe Paint Pouring
- TECHNIQUE: Tree Ring Paint Pouring
- TECHNIQUE: Tube Paint Pouring
- Uncategorized
So, no matter what aspect of acrylic paint pouring interests you the most, there’s a wealth of information and inspiration waiting for you in these various categories.
I hope you’ve enjoyed this article and found inspiration to try out the swipe and spin acrylic paint pouring technique. It’s a super fun way to create unique and mesmerizing artworks. Until next time, happy pouring!